Multifactor Authentication allows a more secure access to accounts, confirming the user is who they say they are.
Configuring Multifactor Authentication in Azure
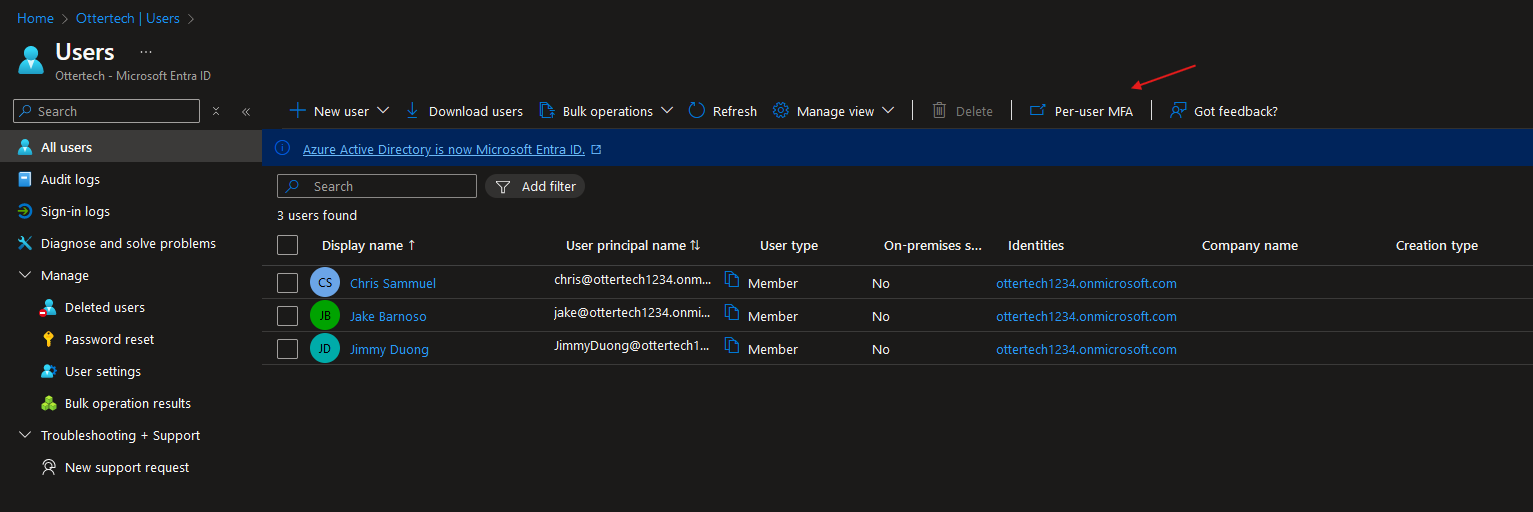
Navigate to Entra ID and select ‘Users’, select ‘Per-user MFA’:
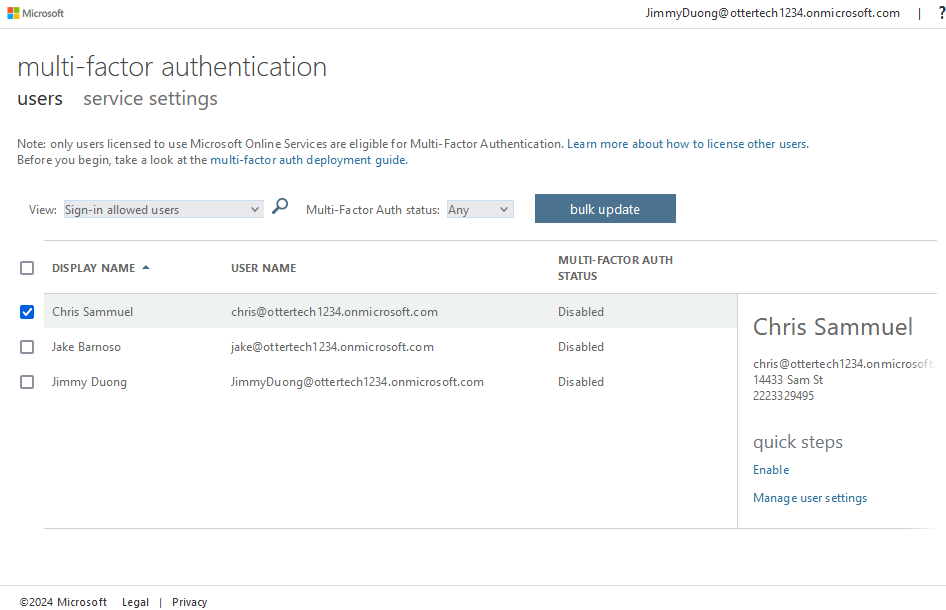
 Select a user you want to turn on MFA:

Click on ‘Enable’ and ‘enable multi-factor auth’:
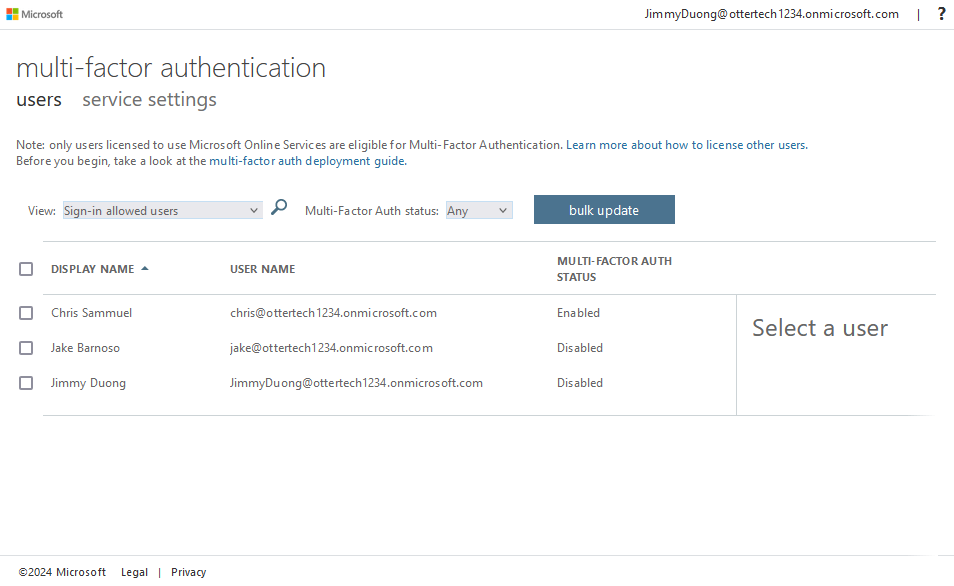
The user now has MFA enabled:
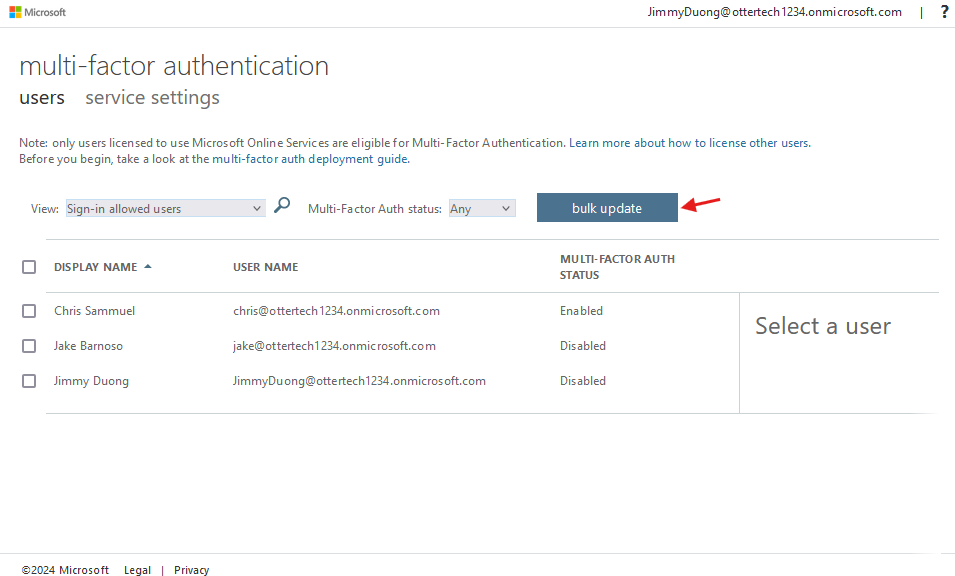
Bulk Update
Bulk turning on MFA for users is simple, in the MFA page, select ‘bulk update’:
Upload the .csv file with the user information and click the next arrow:
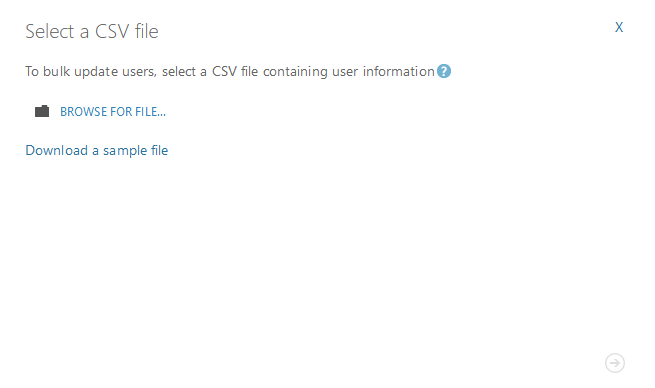
Once the file has been verified, you will have bulk added MFA to users.
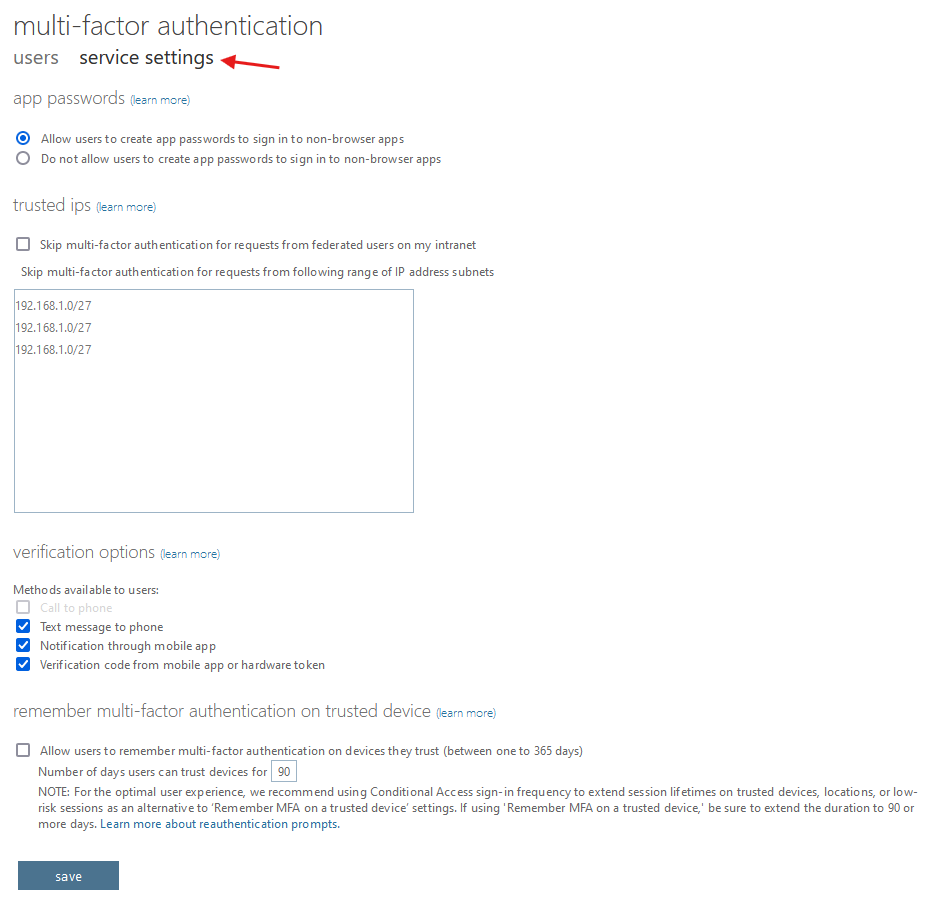
Verification Options and Trusted IPs
You can edit verification options by navigating to the ‘service settings’ section:
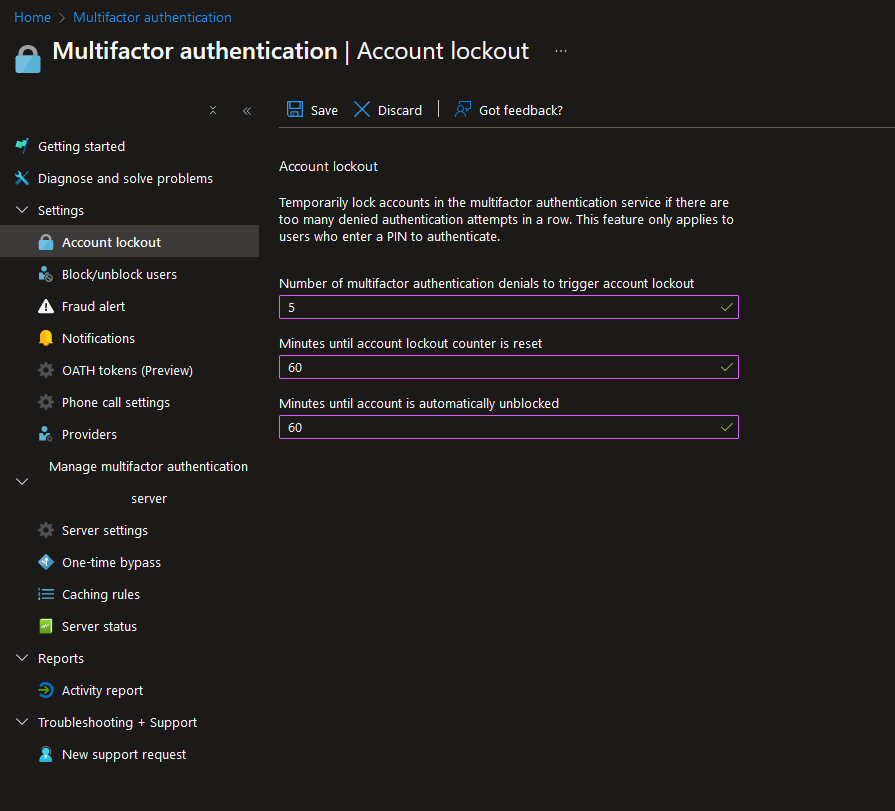
Lockout
Navigate to Multifactor Authentication in the portal and select ‘Account lockout’: