This post will cover the public web architecture for Project OtterVanguard.
Creating DynamoDB:
- Navigate to DynamoDB in the AWS Portal and select ‘Create table’:
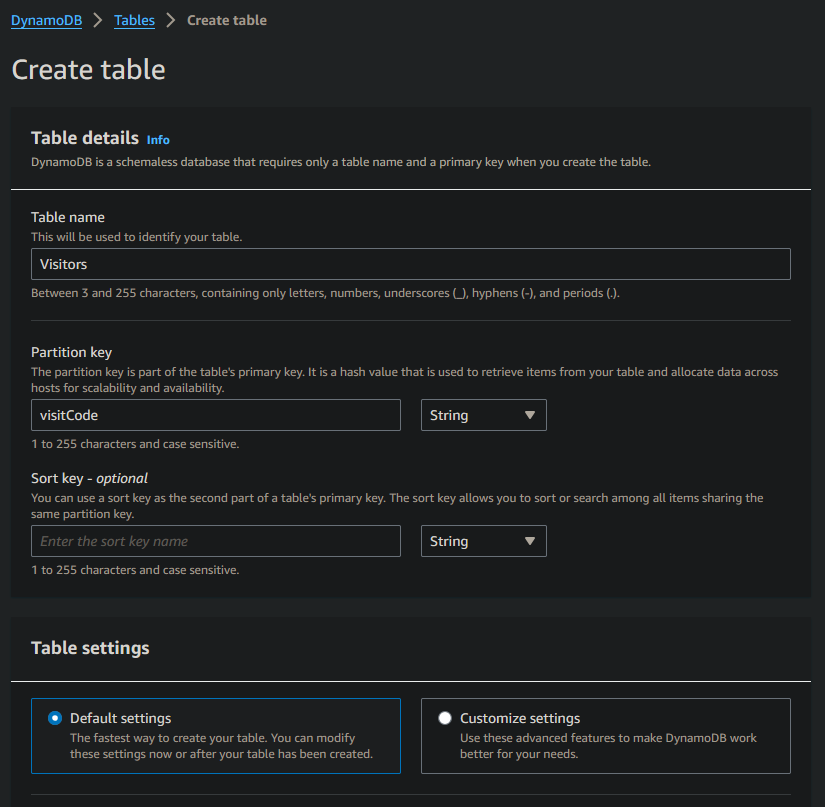
- Give the table a name and enter the partition key:
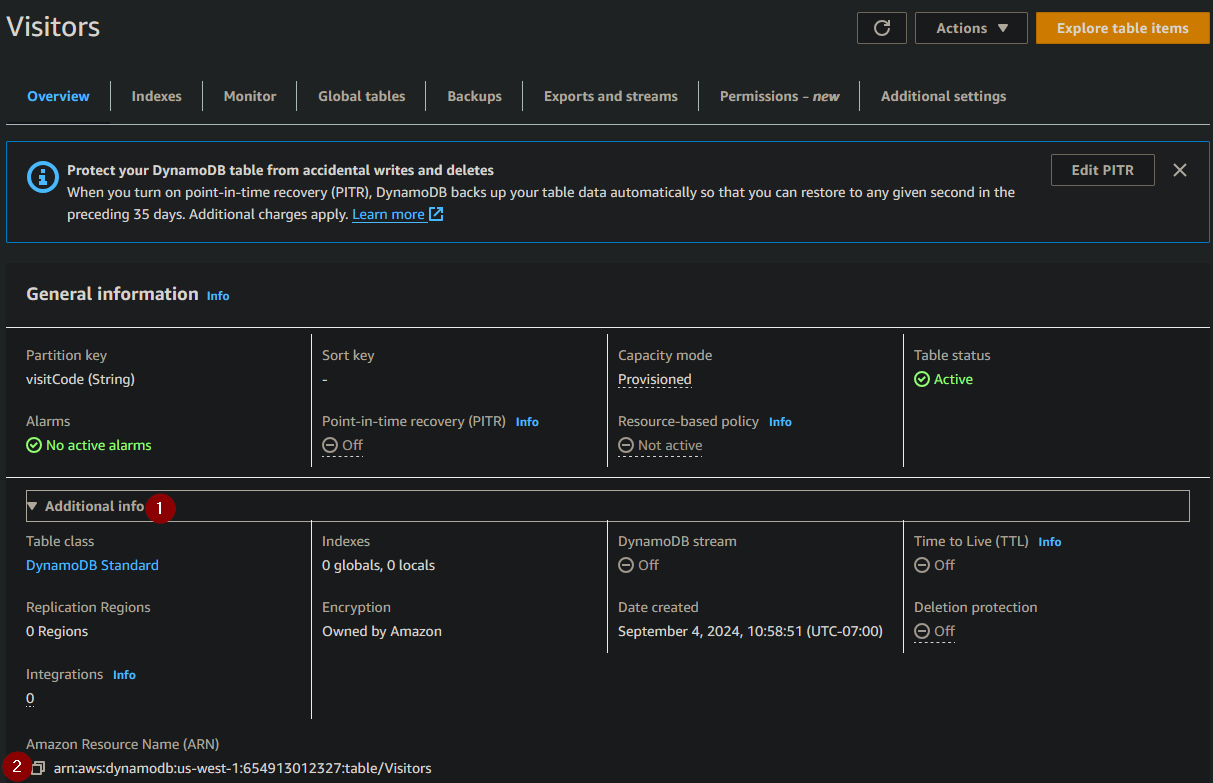
- We have created the DynamoDB table for the website:
 4. Navigate to the table and under ‘Additional info’ save the ARN for later steps:
Creating Lambda Function
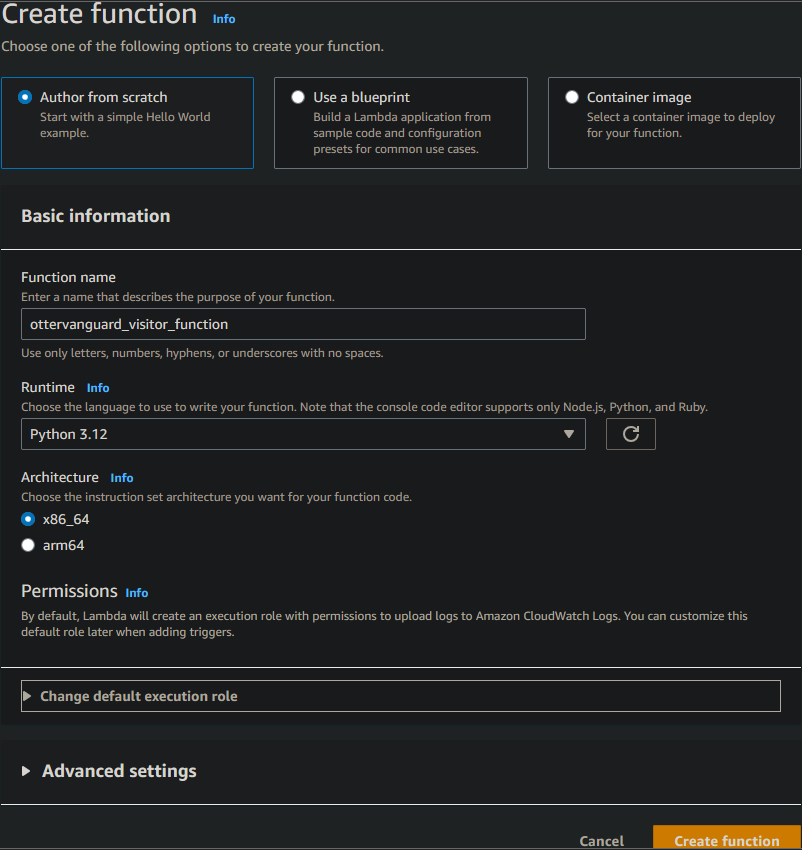
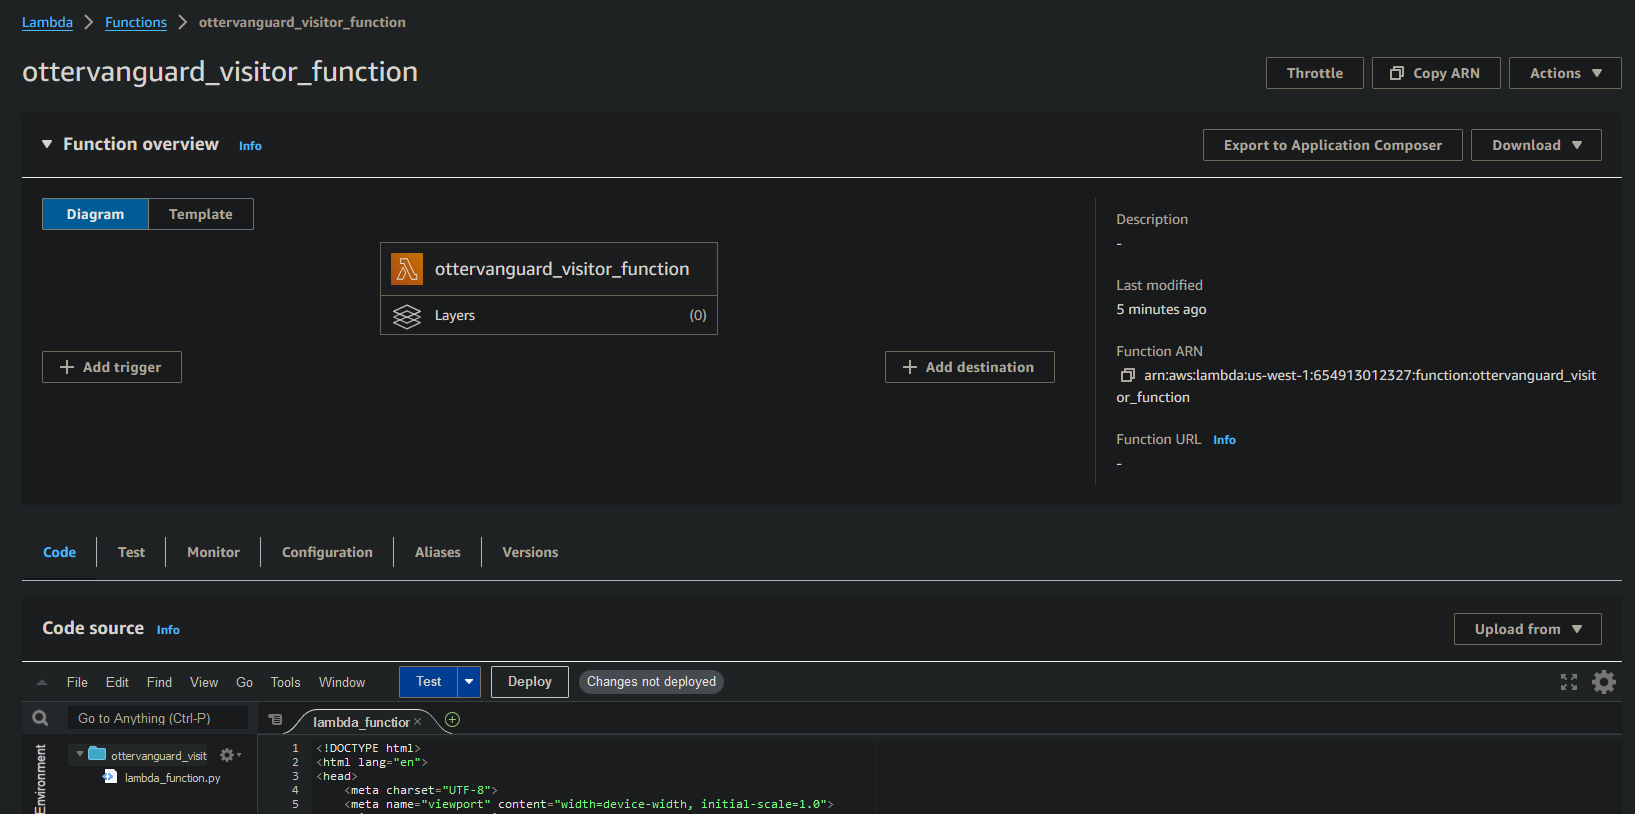
- Navigate to Lambda in the AWS console and select ‘Create function’:

- Give the function a name and select Python 3.12 for the runtime:
- In the code tab, add the function code listed in the GitHub repository and select ‘Deploy’:
Adding permissions:
In order to allow the Lambda to access the DynamoDB, we will need to add read and write permissions to the Lambda.
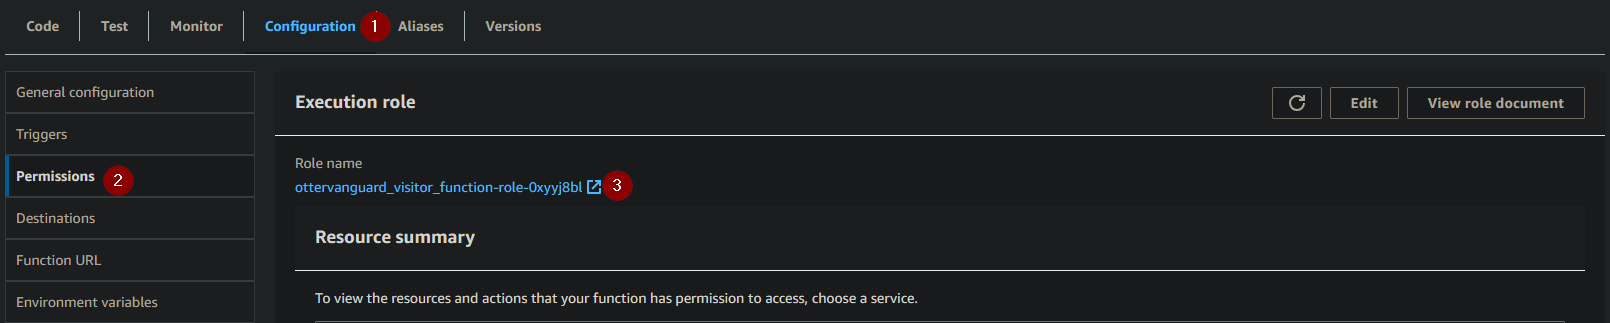
- Inside the Lambda function, select on the configuration tab and permissions. Clock on the role name to be directed to another browser tab:
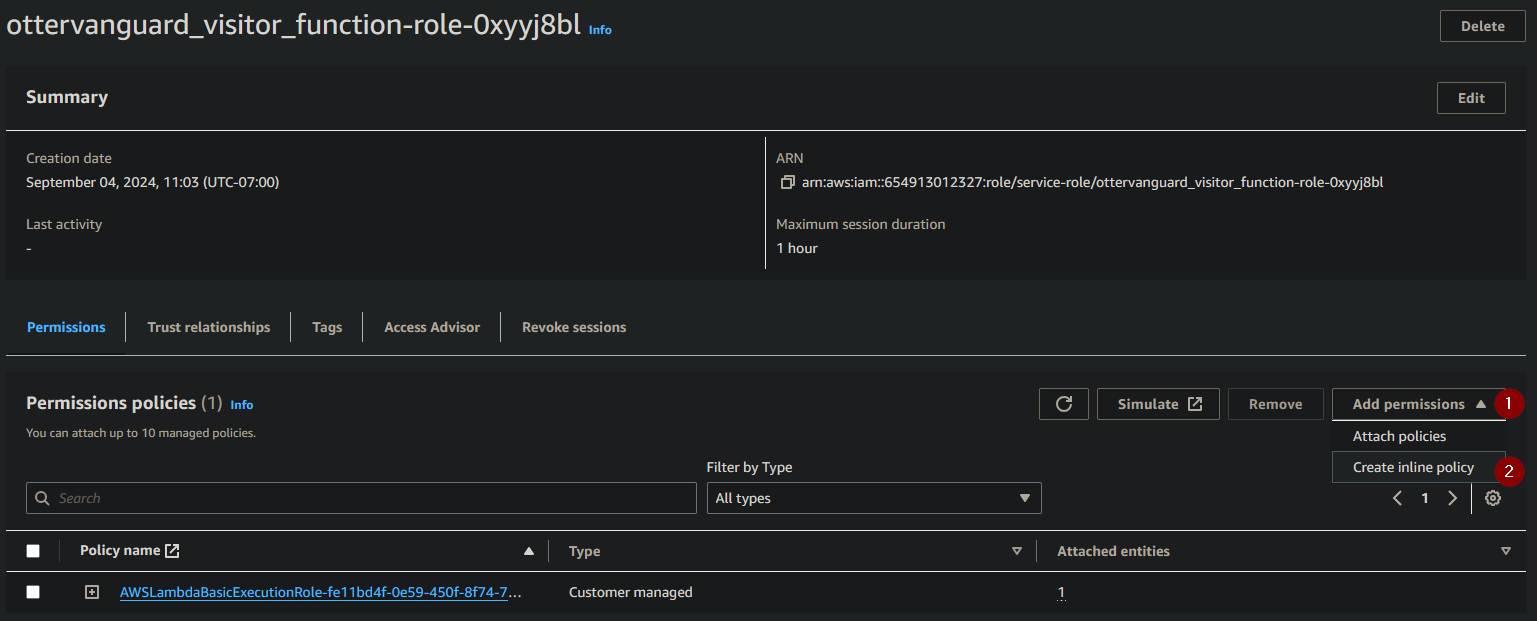
- Select ‘Add permissions’ and ‘Create inline policy’:
- In the ‘Choose a service’ box, type ‘DynamoDB’ and select it:

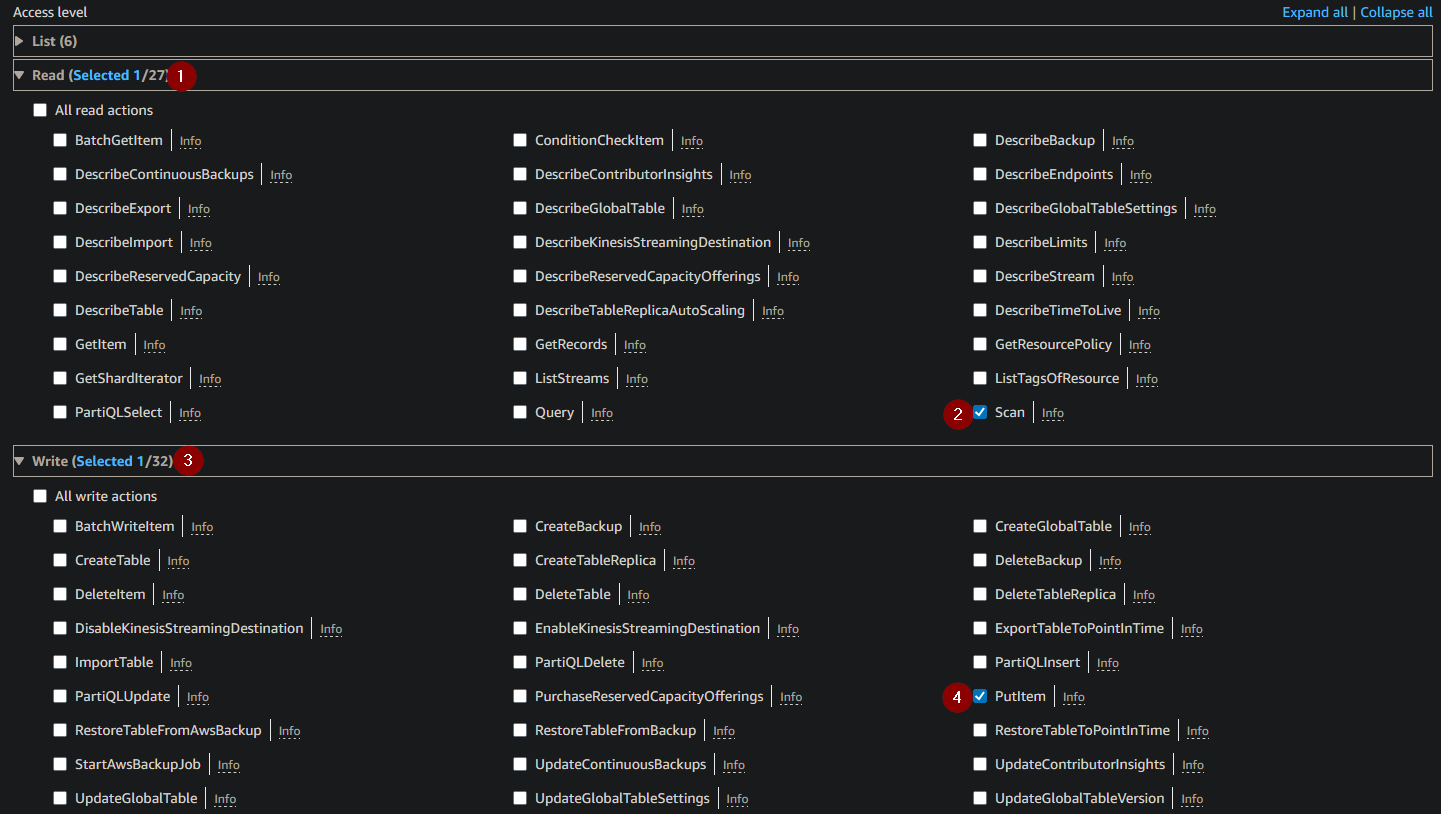
- Select the ‘Scan’ and ‘PutItem’ for the access level:
- Under Resources, paste the ARN of the DynamoDB we created in Step 1. The resource region and table name should autofill.

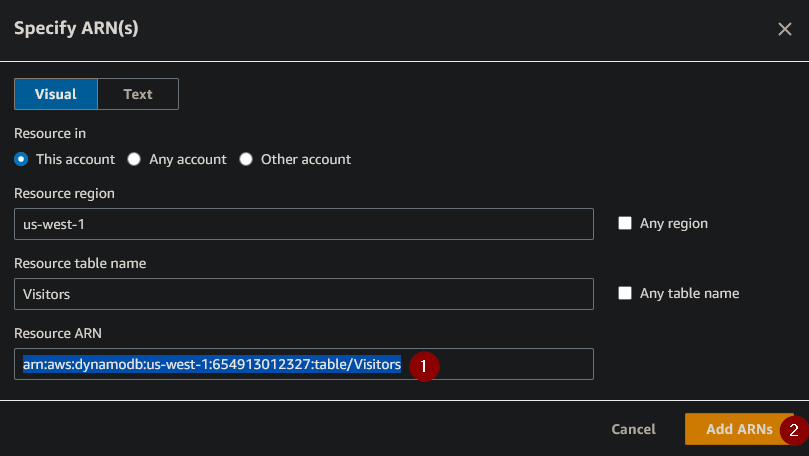
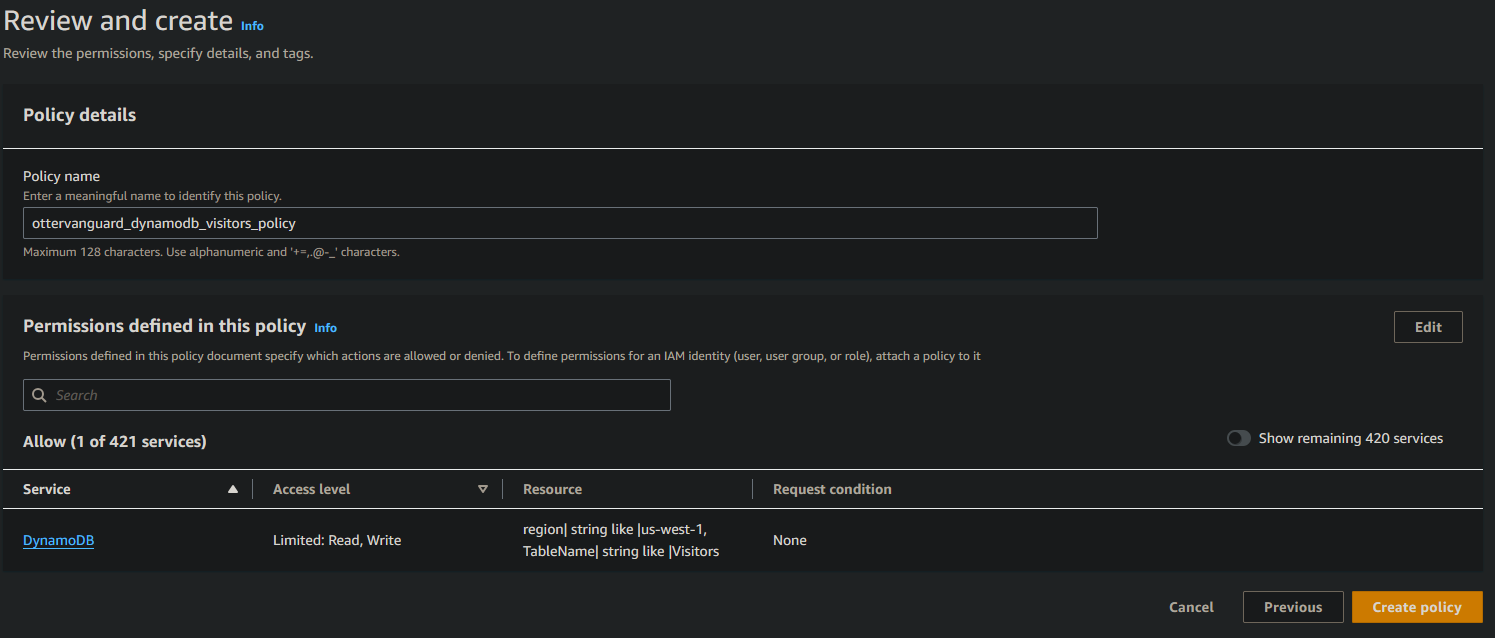
- Once you have added the ARNs, select ‘Next’ and ‘Create policy’:
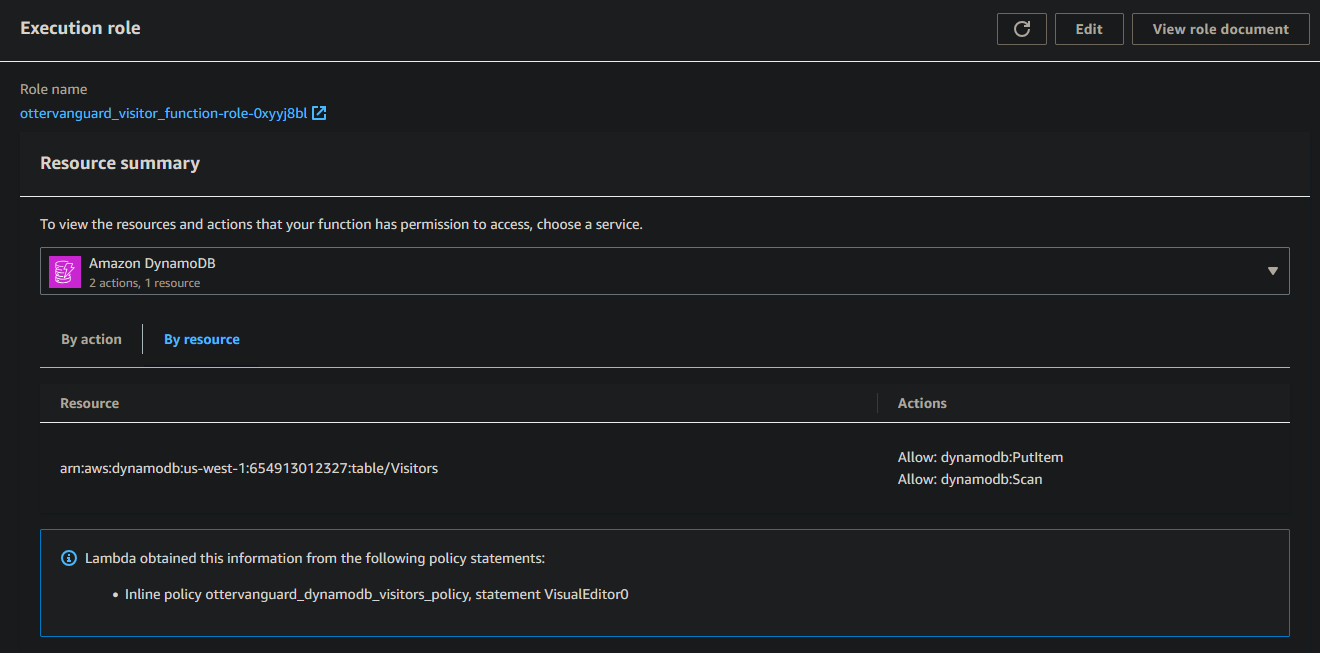
 7. We can now see the DynamoDB permissions in the Lambda function:
Testing the Lambda function
Now we have added the proper permissions, we can test to see if the function can add values to the DynamoDB.
- Navigate to the code of the Lambda function and select ‘Test’